Java 执行 python 代码
本文档介绍了如何在 Java 环境调用 Python 脚本,并最终获取图像输出。文中详细讲解了整个流程,包括使用 Python 的 Agg 后端、通过 -c 参数一次性执行命令,以及利用 Enjoy 模版引擎配合 main.py 执行用户脚本的原理。
1. Java 调用 Python 代码的实现
在 Java 中,我们使用 ProcessBuilder 来调用 Python 命令,并捕获标准输出和错误输出。执行流程如下:
- 根据传入的 Python 脚本路径或代码生成对应的 Python 文件。
- 利用 Enjoy 模版引擎生成最终的 Python 命令代码(见 main.py)。
- 使用
ProcessBuilder调用 Python 的-c参数执行生成的代码。 - 读取输出结果(包含 Base64 编码后的图片数据)及错误信息,并封装为返回结果。
以下为完整的 Java 代码实现:
PythonInterpreterUtils.java
package com.litongjava.linux.utils;

import java.io.BufferedReader;
import java.io.File;
import java.io.IOException;
import java.io.InputStreamReader;
import java.nio.charset.StandardCharsets;
import java.util.ArrayList;
import java.util.List;

import com.jfinal.kit.Kv;
import com.litongjava.linux.vo.PythonResult;
import com.litongjava.template.PythonCodeEngine;
import com.litongjava.tio.utils.encoder.Base64Utils;
import com.litongjava.tio.utils.hutool.FileUtil;
import com.litongjava.tio.utils.snowflake.SnowflakeIdUtils;

public class PythonInterpreterUtils {
  public static PythonResult execute(String scriptPath, String script_dir) throws IOException, InterruptedException {
    String imagesDir = script_dir + File.separator + "images";
    File imagesFolder = new File(imagesDir);
    if (!imagesFolder.exists()) {
      imagesFolder.mkdirs();
    }

    String fullCode = PythonCodeEngine.renderToString("main.py", Kv.by("script_path", scriptPath).set("script_dir", script_dir));

    // 构造 ProcessBuilder
    String osName = System.getProperty("os.name");
    ProcessBuilder pb = null;
    if (osName.toLowerCase().contains("windows")) {
      pb = new ProcessBuilder("python", "-c", fullCode);
    } else {
      pb = new ProcessBuilder("python3", "-c", fullCode);

    }
    Process process = pb.start();

    // 读取标准输出 (可能包含base64以及脚本本身的print信息)
    BufferedReader stdInput = new BufferedReader(new InputStreamReader(process.getInputStream(), StandardCharsets.UTF_8));

    // 读取错误输出
    BufferedReader stdError = new BufferedReader(new InputStreamReader(process.getErrorStream(), StandardCharsets.UTF_8));

    // 用于存放所有的标准输出行
    StringBuilder outputBuilder = new StringBuilder();

    String line;
    while ((line = stdInput.readLine()) != null) {
      outputBuilder.append(line).append("\n");
    }

    // 收集错误输出
    StringBuilder errorBuilder = new StringBuilder();
    while ((line = stdError.readLine()) != null) {
      errorBuilder.append(line).append("\n");
    }

    // 等待进程结束
    int exitCode = process.waitFor();

    // 构造返回实体
    PythonResult result = new PythonResult();
    result.setExitCode(exitCode);
    result.setStdOut(outputBuilder.toString());
    result.setStdErr(errorBuilder.toString());
    File[] listFiles = imagesFolder.listFiles();
    if (listFiles != null && listFiles.length > 0) {
      List<String> images = new ArrayList<>();
      for (File image : listFiles) {
        byte[] readAllBytes = FileUtil.readBytes(image);
        String base64 = Base64Utils.encodeImage(readAllBytes, "image/png");
        images.add(base64);
        result.setImages(images);
      }
    }
    return result;
  }

  /**
   */
  public static PythonResult executeCode(String code) throws IOException, InterruptedException {

    long id = SnowflakeIdUtils.id();
    String folder = "scripts" + File.separator + id;
    File fileFolder = new File(folder);
    if (!fileFolder.exists()) {
      fileFolder.mkdirs();
    }
    String scriptPath = folder + File.separator + "script.py";
    FileUtil.writeString(code, scriptPath, StandardCharsets.UTF_8.toString());
    return execute(scriptPath, folder);
  }

  public static PythonResult executeScript(String scriptPath) throws IOException, InterruptedException {
    long id = SnowflakeIdUtils.id();
    String folder = "scripts" + File.separator + id;
    File fileFolder = new File(folder);
    if (!fileFolder.exists()) {
      fileFolder.mkdirs();
    }
    return execute(scriptPath, folder);
  }
}
该工具类中主要方法包括:
- execute(String scriptPath, long id):根据给定脚本路径和临时 ID 生成完整的 Python 代码,并通过 ProcessBuilder 调用 Python 解释器执行。执行结束后读取输出信息,并判断是否生成了图像文件,将其转换为 Base64 数据返回。
- executeCode(String code):将传入的代码写入到临时文件中,然后调用 execute 方法执行脚本。
- executeScript(String scriptPath):直接使用传入的脚本文件路径执行脚本。
2. Enjoy 模版引擎的使用
为了灵活生成执行的 Python 代码,我们采用了 Enjoy 模版引擎,将 main.py 模版与参数进行渲染。Enjoy 模版主要配置如下:
PythonCodeEngine.java
package com.litongjava.template;

import com.jfinal.kit.Kv;
import com.jfinal.template.Engine;
import com.jfinal.template.Template;
import com.litongjava.db.activerecord.Db;
import com.litongjava.tio.utils.environment.EnvUtils;

public class PythonCodeEngine {
  public static final String tableName = "llm_python_code";
  public static final String sql = "select prompt from " + tableName + " where name=? and env=?";
  public static final String RESOURCE_BASE_PATH = "/python/";
  public static Engine engine;
  static {
    engine = Engine.create("prompt");
    engine.setBaseTemplatePath(RESOURCE_BASE_PATH);
    engine.setToClassPathSourceFactory();
    if (EnvUtils.isDev()) {
      // 支持模板热加载,绝大多数生产环境下也建议配置成 true,除非是极端高性能的场景
      engine.setDevMode(true);
    }

    // 配置极速模式,性能提升 13%
    Engine.setFastMode(true);
    // jfinal 4.9.02 新增配置:支持中文表达式、中文变量名、中文方法名、中文模板函数名
    Engine.setChineseExpression(true);

  }

  public static Template getTemplate(String filename) {
    return engine.getTemplate(filename);
  }

  public static String renderToString(String fileName, Kv kv) {
    return engine.getTemplate(fileName).renderToString(kv);
  }

  public static String renderToString(String fileName) {
    return engine.getTemplate(fileName).renderToString();
  }

  public static String renderToStringFromDb(String fileName) {
    String queryStr = Db.queryStr(sql, fileName, EnvUtils.env());
    Template template = engine.getTemplateByString(queryStr);
    return template.renderToString();
  }

  public static String renderToStringFromDb(String fileName, Kv kv) {
    String queryStr = Db.queryStr(sql, fileName, EnvUtils.env());
    Template template = engine.getTemplateByString(queryStr);
    return template.renderToString(kv);
  }
}
Enjoy 模版引擎用于动态生成 Python 脚本的执行代码,本例中主要生成的模版文件为 main.py。通过传入参数 script_path 和 temp_id,可以动态替换模版中的占位符。
3. main.py 模版解析
main.py 模版负责完成如下操作:
1. 强制使用无图形界面后端
为避免 Matplotlib 在执行 plt.show() 时调用 GUI 后端(如 TkAgg、QtAgg 等),在模版最开始通过环境变量 MPLBACKEND 强制设置为 'Agg'。Agg 是非交互式的后端,不会弹出窗口也不会阻塞程序。
import os
# 1. 强制使用Agg后端
os.environ['MPLBACKEND'] = 'Agg'
2. 执行用户的原始脚本
读取传入的脚本文件内容,并利用 exec 函数在当前进程中执行。
# 2. 读入并执行你的脚本
code = open(r'#(script_path)', 'r', encoding='utf-8').read()
exec(code, {'__name__': '__main__'})
3. 执行完后保存图片
因为原始脚本中调用了 plt.show()(在 Agg 后端下不执行任何操作),所以我们在脚本执行完毕后,通过 plt.savefig(...) 将当前绘制好的图保存到指定位置。
# 3.保存图片
for i, num in enumerate(plt.get_fignums(), start=1):
    plt.figure(num)  # 激活对应的图像
    plt.savefig(rf'#(script_dir)/images/{i}_plot.png')
完整的 main.py
完整的 main.py 模版如下:
import warnings
warnings.filterwarnings('ignore', message='.*FigureCanvasAgg is non-interactive.*')

import matplotlib.pyplot as plt

# 重写 plt.show() 为一个空函数(或仅做显示,不清除图像)
plt.show = lambda: None

import os
# 1. 强制使用Agg后端
os.environ['MPLBACKEND'] = 'Agg'

# 2. 读入并执行你的脚本
code = open(r'#(script_path)', 'r', encoding='utf-8').read()
exec(code, {'__name__': '__main__'})

# 3.保存图片
for i, num in enumerate(plt.get_fignums(), start=1):
    plt.figure(num)  # 激活对应的图像
    plt.savefig(rf'#(script_dir)/images/{i}_plot.png')
4. 示例 Python 脚本说明
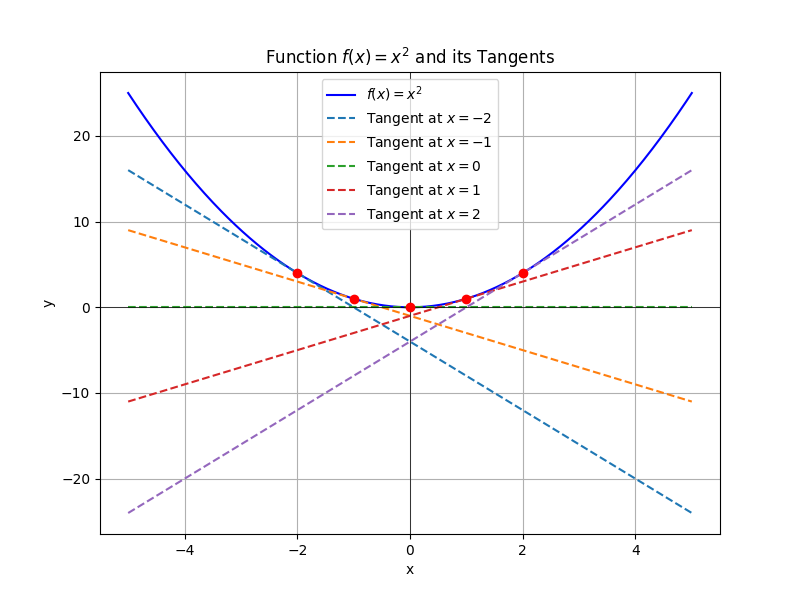
下面给出一个示例 Python 脚本 myscript.py,演示如何绘制函数图形和其切线。该脚本内容如下:
import numpy as np
import matplotlib.pyplot as plt

# 定义函数 f(x) = x^2
def f(x):
    return x**2

# 定义切线方程
def tangent_line(a, x):
    return 2*a*x - a**2

# 生成 x 数据
x = np.linspace(-5, 5, 400)
y = f(x)

# 选取多个切点
a_values = [-2, -1, 0, 1, 2]

# 绘图
plt.figure(figsize=(8, 6))
plt.plot(x, y, label=r'$f(x) = x^2$', color='blue')

# 绘制每个切点的切线
for a in a_values:
    tangent_y = tangent_line(a, x)
    plt.plot(x, tangent_y, '--', label=fr'Tangent at $x={a}$')

    # 标记切点
    plt.scatter(a, f(a), color='red', zorder=3)

# 设置图表属性
plt.xlabel('x')
plt.ylabel('y')
plt.title('Function $f(x) = x^2$ and its Tangents')
plt.axhline(0, color='black', linewidth=0.5)
plt.axvline(0, color='black', linewidth=0.5)
plt.legend()
plt.grid(True)

# 显示图形
plt.show()
该脚本先生成了函数 ( f(x) = x^2 ) 的曲线,并绘制了在不同切点的切线,同时标记了切点位置。在 Agg 后端下,plt.show() 不会弹窗,脚本会直接结束,之后 main.py 会调用 plt.savefig(...) 将图形保存到文件。
输出多个图片的实例脚本
import numpy as np
import matplotlib.pyplot as plt

# Define the range of x values
x = np.linspace(-10, 10, 400)

# Define the functions
y1 = x**2
y2 = x**3

# Create the plot
plt.figure(figsize=(8, 6))
plt.plot(x, y1, label=r'$f(x) = x^2$', linewidth=2)
plt.plot(x, y2, label=r'$f(x) = x^3$', linewidth=2)

# Add labels and title
plt.xlabel('x')
plt.ylabel('f(x)')
plt.title('Graphs of $f(x) = x^2$ and $f(x) = x^3$')
plt.axhline(0, color='black', linewidth=1, linestyle='--')
plt.axvline(0, color='black', linewidth=1, linestyle='--')
plt.legend()
plt.grid(True)

# Show the plot
plt.show()


# First plot for f(x) = x^2
plt.figure(figsize=(8, 6))
plt.plot(x, y1, label=r'$f(x) = x^2$', linewidth=2, color='blue')
plt.xlabel('x')
plt.ylabel('f(x)')
plt.title('Graph of $f(x) = x^2$')
plt.axhline(0, color='black', linewidth=1, linestyle='--')
plt.axvline(0, color='black', linewidth=1, linestyle='--')
plt.legend()
plt.grid(True)
plt.show()

# Second plot for f(x) = x^3
plt.figure(figsize=(8, 6))
plt.plot(x, y2, label=r'$f(x) = x^3$', linewidth=2, color='orange')
plt.xlabel('x')
plt.ylabel('f(x)')
plt.title('Graph of $f(x) = x^3$')
plt.axhline(0, color='black', linewidth=1, linestyle='--')
plt.axvline(0, color='black', linewidth=1, linestyle='--')
plt.legend()
plt.grid(True)
plt.show()
5. 测试代码
为了验证整个调用流程,我们还提供了一个测试用例,该测试代码通过调用 PythonInterpreterUtils.executeScript 方法执行 myscript.py 脚本,并以 JSON 格式打印出执行结果。
package com.litongjava.linux.utils;

import org.junit.Test;

import com.litongjava.linux.vo.PythonResult;
import com.litongjava.tio.utils.json.JsonUtils;

public class PythonInterpreterUtilsTest {

  @Test
  public void executeScript() throws Exception {
    // 假设你的脚本文件名叫 "myscript.py"
    String scriptPath = "myscript.py";
    PythonResult result = PythonInterpreterUtils.executeScript(scriptPath);
    System.out.println(JsonUtils.toJson(result));
  }
}
执行结果示例如下:
{
  "exitCode": 0,
  "image": "data:image/png;base64,iVBORw0KGgoA..",
  "stdOut": "",
  "stdErr": ""
}
其中,image 字段包含生成的图片文件经过 Base64 编码后的数据,exitCode 为 0 表示脚本成功执行。
6. 使用 Handler 调用
在实际项目中,可以通过 HTTP 请求调用 Python 执行服务。以下示例代码展示了如何在 Handler 中接收 HTTP 请求的 body(Python 代码),调用 PythonInterpreterUtils.executeCode 方法执行代码,并返回 JSON 格式的结果。
package com.litongjava.linux.handler;

import com.litongjava.linux.utils.PythonInterpreterUtils;
import com.litongjava.linux.vo.PythonResult;
import com.litongjava.tio.boot.http.TioRequestContext;
import com.litongjava.tio.http.common.HttpRequest;
import com.litongjava.tio.http.common.HttpResponse;

import lombok.extern.slf4j.Slf4j;

@Slf4j
public class PythonHanlder {

  public HttpResponse index(HttpRequest request) {
    String code = request.getBodyString();
    HttpResponse response = TioRequestContext.getResponse();

    try {
      PythonResult executeScript = PythonInterpreterUtils.executeCode(code);
      response.setJson(executeScript);
    } catch (Exception e) {
      log.error(e.getMessage(), e);
      response.setStatus(500);
      response.setString(e.getMessage());
    }
    return response;
  }

}
请求测试
curl --location --request POST 'http://127.0.0.1/python' \
--header 'User-Agent: Apifox/1.0.0 (https://apifox.com)' \
--header 'Authorization: Bearer 123456' \
--header 'Content-Type: text/plain' \
--header 'Accept: */*' \
--header 'Host: 127.0.0.1' \
--header 'Connection: keep-alive' \
--data-raw 'import numpy as np
import matplotlib.pyplot as plt

# 定义函数 f(x) = x^2
def f(x):
    return x**2

# 定义切线方程
def tangent_line(a, x):
    return 2*a*x - a**2

# 生成 x 数据
x = np.linspace(-5, 5, 400)
y = f(x)

# 选取多个切点
a_values = [-2, -1, 0, 1, 2]

# 绘图
plt.figure(figsize=(8, 6))
plt.plot(x, y, label=r'\''$f(x) = x^2$'\'', color="blue")

# 绘制每个切点的切线
for a in a_values:
    tangent_y = tangent_line(a, x)
    plt.plot(x, tangent_y, '\''--'\'', label=fr'\''Tangent at $x={a}$'\'')

    # 标记切点
    plt.scatter(a, f(a), color='\''red'\'', zorder=3)

# 设置图表属性
plt.xlabel('\''x'\'')
plt.ylabel('\''y'\'')
plt.title('\''Function $f(x) = x^2$ and its Tangents'\'')
plt.axhline(0, color='\''black'\'', linewidth=0.5)
plt.axvline(0, color='\''black'\'', linewidth=0.5)
plt.legend()
plt.grid(True)

# 显示图形
plt.show()'
7. 关键技术点说明
强制使用无图形界面(非交互)后端
Matplotlib 默认在执行 plt.show() 时,会调用 GUI 后端(如 TkAgg、QtAgg 等),导致弹窗并阻塞程序。为了避免这一问题:
- 通过设置环境变量
MPLBACKEND=Agg强制使用 Agg 后端。Agg 后端为非交互式后端,不会显示窗口,也不会阻塞程序运行。 - 设置在
main.py脚本的最前端,不需要修改用户原始脚本。
执行原脚本后再保存图片
由于原始脚本中可能调用了 plt.show() 来显示图形,而在 Agg 后端下该方法不作任何操作,所以我们在脚本执行完毕后调用 plt.savefig(...) 保存当前绘制的图像。
- 利用 Python 的
-c选项一次性执行整个命令,在exec执行完原始代码后,立即调用plt.savefig(...)保存图片。
Enjoy 模版与 main.py 配合
Enjoy 模版引擎将 main.py 模版文件与传入参数(如 script_path、temp_id)动态渲染生成最终的 Python 代码。该代码中嵌入了用户的原始脚本路径,并指定了生成图片的临时文件名。
- 模版文件
main.py存放在资源目录/python/下。 - 在 Java 端通过
PythonCodeEngine.renderToString("main.py", Kv.by("script_path", scriptPath).set("temp_id", id))完成渲染,确保参数替换正确。
其他必要部分
- 文件夹管理:在执行 Python 脚本前,程序会自动检查并创建
images和scripts文件夹,确保生成图片和脚本文件有存储位置。 - 唯一 ID 生成:利用 Snowflake 算法生成唯一 ID,用于区分每次执行生成的图片文件。
- Base64 图片编码:执行完脚本后,若图片生成成功,程序读取图片文件内容并转为 Base64 编码字符串,方便通过 HTTP 返回数据给前端展示或后续处理。
封装为 Docker
FROM litongjava/jdk:8u411-stable-slim

# 第一步:安装 ffmpeg 和相关依赖
RUN apt-get update && \
    apt-get install -y --no-install-recommends ffmpeg libmp3lame0 wget curl  ca-certificates && \
    rm -rf /var/lib/apt/lists/*

# 第二步:安装 python3.11
RUN apt-get update && \
    apt-get install -y --no-install-recommends python3 python3-pip && \
    rm -rf /var/lib/apt/lists/*


# 设置工作目录
WORKDIR /app

# 安装 Python 依赖
COPY requirements.txt /app/
RUN pip install --no-cache-dir -r requirements.txt --break-system-packages

# 复制 JAR 文件到容器
COPY target/java-linux-1.0.0.jar /app/

# 运行 JAR 文件
CMD ["java", "-jar", "java-linux-1.0.0.jar"]
requirements.txt
- **numpy**:用于高效的多维数组和矩阵运算,是数值计算的基础包。
- **matplotlib**:一个强大的绘图库,能够生成高质量的图形和可视化结果。
- **pandas**:主要用于数据处理和分析,提供了高效的数据结构(如 DataFrame)和数据操作工具。
- **scipy**:基于 numpy,提供了更多的科学计算工具,如积分、优化、信号处理等。
- **seaborn**:基于 matplotlib,提供更高级、更美观的数据可视化接口,适合统计图表绘制。
- **scikit-learn**:机器学习库,包含了大量常用的机器学习算法和数据预处理工具。
- **statsmodels**:用于统计建模和计量经济学分析,适合需要详细统计检验和模型诊断的场景。
- **requests**:简化 HTTP 请求的库,用于网络数据获取。
总结
本文详细介绍了如何在 tio-boot 框架下实现 Java 调用 Python 脚本的完整流程。通过强制使用非交互式的 Agg 后端、利用 Enjoy 模版动态生成执行代码、以及在脚本执行完后保存图片,整个方案实现了对原始 Python 脚本的无侵入式调用,并能将图像输出以 Base64 数据形式返回给调用方。上述所有代码均已完整展示,读者可根据实际需求进行调整和扩展。
希望这篇文档能帮助你深入理解并顺利应用该技术方案。